Deployments
After merging your changes to master, setup a release to deploy your changes to production.
- View your release
- Releases
- Your release will trigger automatically after your PR is completed.
- Some core scenario tests will run on your release to ensure the scenarios are still working as intended with your changes.
- Get approval to deploy your changes to staging The next step in the deployment is deploying your changes to the staging environment. The staging environment will always run on production code and exists in case there is a need to rollback a deployment. You will need an approval before you deploy your release to the staging environment. See the steps below for the approval process.
- View the build that contains your latest changes
- Build pipeline
- Click on your build
- Navigate to Jobs -> Phase 1 -> Version Project file
- The last output line in this Version Project file will contain version in the format v0.0.000 (v.4.0.1154 for example).
- Append this version as a query parameter in a Control Tower and Studio UX to verify your changes.
-
Control tower
https://exp.microsoft.com/?workspaceId=a5766fee-9478-488b-9fc0-64d1ad72c290&_version=[version]
-
Studio
https://exp.microsoft.com/workspaces/d0b5adff-df5f-4199-bdd9-31b28eb33507?_version=[version]
- Next find previous deployment and track all of the changes made after that will be taken to production with this deployment.
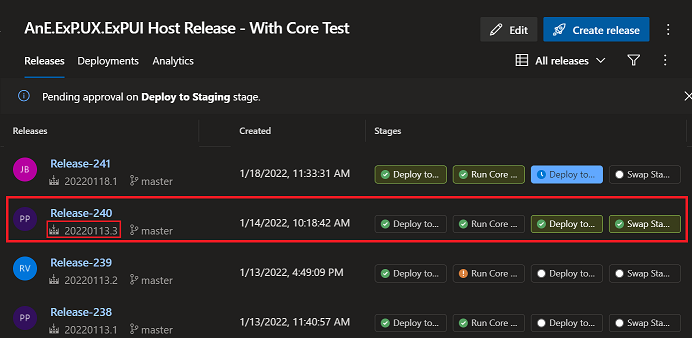
- Check previous releases to see which was the last deployment to production.
- The green check marks beside 'deploy to staging' and 'swap staging and production' indicate which releases were deployed successfully. Note the build version.
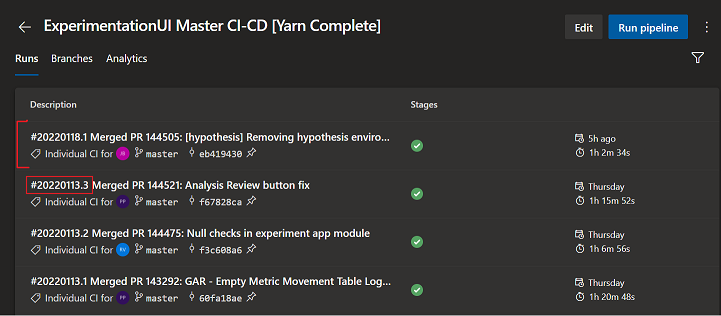
- Navigate back to the build pipeline and take a screenshot of all changes pushed after the previous deployment. You can tell which changes were taken in the previous deployment by the build version.
- Now make a post in the UX teams channel containing a link to the release, the CT and studio links to test the release, and the screenshot of the changes included in the release.
- Once the release is approved it will automatically deploy and you must monitor this dashboard.